Recently, while trying to accelerate my blog load speed, I also want to get all my pictures a cdn. Also I’m tired of uploading the picture every time I want to quote a picture in my post, So I found a softeware PicGo.
I’m using Typora to edit markdown files.
And downloading PicGo is also needed. click here to download V2.2.2
Then you need to have a GitHub Repository to store your images.
First, find GitHub 图床 in PicGo.

“设定仓库名”(set repository name)
the format is GitHub_Username/repo_name. Be sure to write username because I forgot to write it and I can’t upload the picture which confused me a long time.
“设定分支名”(set branch name)
usually is main or master
“设定Token”(set token)
First you need to generate a token for PicGo.
Setting -> Developer settings -> Personal access tokens -> generate a new token
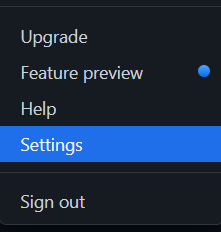
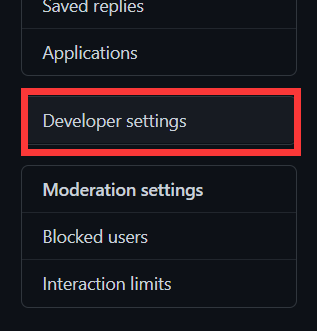

Fill Note and select Expiration.
Then select scopes, according to the docs of PicGo, it only need to select repo
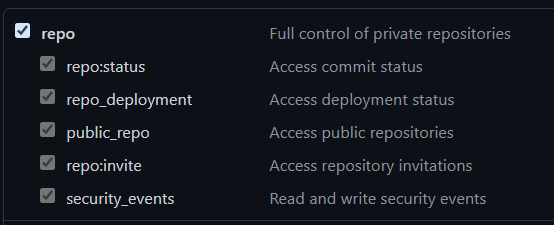
Then go to the bottom Generate Token.
The token will be shown like this.

copy the token to PicGo.
Note that you can save the token to a file because once you refresh the page, you can not see the content of token again.
“指定存储路径”(set storage path)
Set the folder in your repo.
“设定自定义域名”(set custom domain)
In this situation, since I want to use jsDelivr to make my image faster and I don’t want to type https://cdn.jsdelivr.net/gh/github_Username/repo_Name every time, I can fill this to the blank.
Then, you need to set for typora.
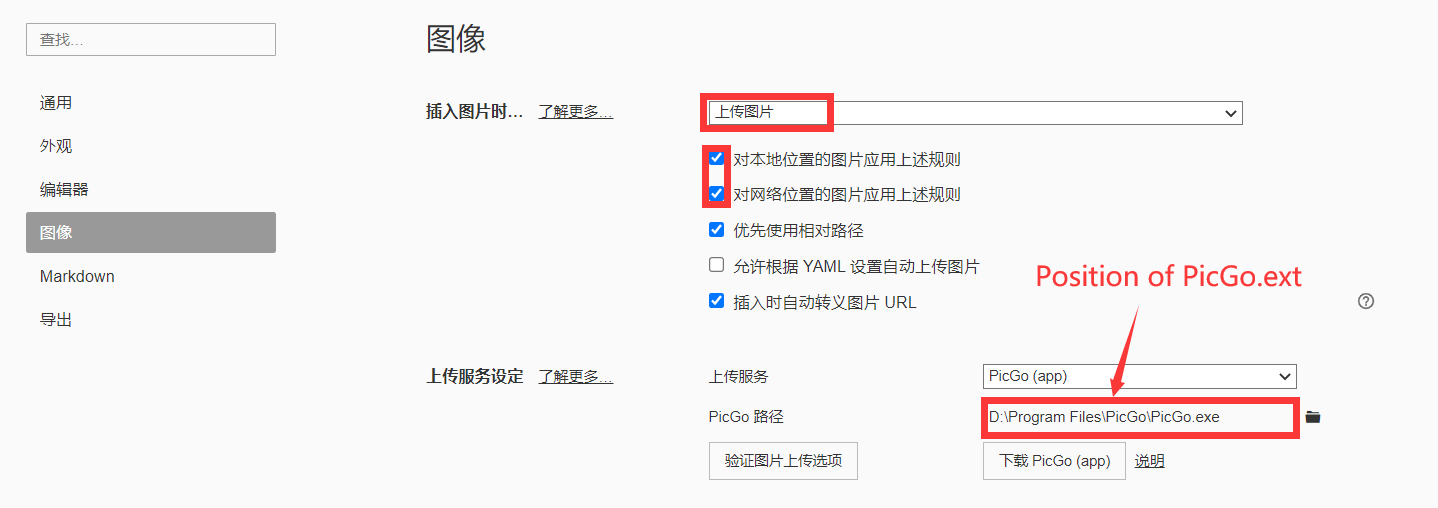
The configuration is this.
After all the settings, press the button 验证图片上传选项to test whether all the functions can work.
At last, next time you copy a image into typora, it will automatically upload your picture to your “image hosing service” and returns an url that with the jsDelivr prefix.
First one is that there is a file with the same name already exists in the repo. In this case, you can select  this to rename your file using timestamp.
Other errors may be that you wrote your username or repo name wrong.
For more errors, you can check  this to see the log file.
In order to be easy, I did not create a new repository for images, I just want it to store in the Blog repo. So when I preview my posts in localhost, it works fine and the pictures all can be shown.
But a day later,when I tried to open my blog, I found that the pictures can’t load. I check the link and the picture can’t be opened. Then I went to see the repo and the pictures are just gone!!!
That’s because when I deploy my blog, I push all the things to the repo to cover the repo, because I didn’t have the pictures in my local files, the files covers the old repo, then the images are disappeared. And even the commits of PicGo disappeared.
At last, I still have to create a new repo for images.

